Showing posts with label leave-behind. Show all posts

Wednesday, 23 December 2015

Glitter Makes Everything Creative


One of the upsides of not having any serious DIY crafting talent is letting Ladybug Girl in on the creativity.  I really wish I had more patience and fine motor skills, but if I did I would probably be too much of a perfectionist to do projects with my daughter.

This way I can relax and still model the importance of expressing yourself and being creative.  My mama mentor for this is Jean of The Artful Parent and her insightful article about how parents influence the way their children approach art.

This is our story.

Tuesday, 22 December 2015

3 Ways to Make Play Snow

We have tropical weather all year round so snow is full of wonder and mystery.  Blame it on the overload of Christmas books and movies!  From my friends who actually live with snow on the other side of the world however, snow is played in for just a short while and the season stays way too long. 

I can't imagine why you would want to do these if you had actual snow outside your door during Christmas, but for all us tropical-loving folk, here are three ways we've made snow for play:


Sunday, 24 May 2015

Leave-Behind An Easy Geography Lesson

Geography is one of the things in my daughter's Montessori curriculum that surprised traditional old me.  How is geography basic preschool fare?  

It's a little genius though.  Montessori philosophy believes that children must first learn about the physical world around them - to use their senses to explore and to know that everything has a name so that children tend to want to learn everything.  
Of course my usual dilemma is finding the time to recreate all those wonderful homeschooling lessons, like this one from the truly amazing Pinay Homeschooler.  So yet again, here's one of my working mama solutions.  

Sunday, 15 March 2015

What We Do With Book Jackets

If you're anal about keeping your books good-as-new, look away right now.  
You won't like seeing what I do with them.


I've been cutting up the dust jackets on Ladybug Girl's books ever since we started buying them. 

Like a ritual, she always removed the dust covers because they got in the way of reading.  I soon got tired of being book-anal myself so I began to think of ways to squeeze some use from the covers rather than keeping them in storage or throwing them in the trash.

We have this box in her art shelf for making collages or artwork:
  
A few books into this, I've delegated the cutting to Yaya  

I lost the pictures of some of the artwork from this box, but you get the idea.  Sometimes we take the box to bed at night, and I choose a random cut-out and ask if she remembers the book and what happened in the story.  Just fun.

If you're really serious about squeezing more use out of the covers, cut out the words.  I left this invitation to make her own silly phrases which is really sneaky practice in early creative writing.  This one was inspired by the Montessori movable alphabet.

All it is my favorite contact paper stuck down to her easel, sticky-side out:

We had a good laugh after I got home to see what phrases she made.

Last one to share is my favourite.  You know how the dust jackets print a preview of what the book is about?  I have that cut up too along with the title.  Like an answer sheet, she has to stick the correct title to match the preview.  This one was inspired by the hands-on Montessori nomenclature work where a child matches cards.  Something like this:


And this:

That's still contact paper stuck down to the tray, sticky-side up

I once used a box-lid and washi-tape instead of the whole contact paper set-up.  Washi tape re-sticks easily so it's easy to move around the titles:


As an early reader it was one of her favourite activities to do. 

If you're wondering how our cover-less books are doing, I've never missed them.  Those hardcovers are pretty sturdy!  Sometimes you have to let go of the extras if you want to make shortcuts.  

post signature

Tuesday, 10 March 2015

A Shortcut to Art Appreciation

It's only through my daughter's Montessori education that art ever entered my consciousness.  I don't recall ever studying art or music appreciation at traditional school, do you?  Montessori places huge value in art as a form of expression, abstraction and imagination.  
The classrooms use nomenclature cards to build an awareness, vocabulary and interest in artists' works.  I've seen many great homeschool resources online for you to DIY your own art card sets.  Basically you download, print, laminate and cut  -- I've tried it.
My laminating machine is a grossly under-utilised capital expenditure ever since.
This is my working-mom solution:

Thursday, 12 February 2015

Leave a Valentine-Making Station

Ever since Ladybug Girl turned old enough to understand Valentines day, we've made cards.  Just cards.  You would think that with all the craze and craft ideas out there, I would cook up something fancy.  

Nope, I've stuck with cards.  Here's why.


Materials are cheap and plenty:  

paper, stickers and pens.  bam.

 It makes for great no-brainer floor time together after work:
Doing it together models the practice, and the value of thoughtfulness

And best of all - you've got an instant high-interest activity tray for leave-behind play!  If you didn't know this yet, I love a good activity that Ladybug Girl can have fun learning with while I'm at the office.  There's a whole gallery built on this here.

In our early years, I started leaving behind super-simple card-making prompts like this:

that started out as a blank card, pink and red pencils, and cool stickers

A year older, I began to leave a box for letter-making.  Which she later filled with her finished cards and marked for the occasion:

The "Val(entine's) Day Box" : so special, she wrote in real letters instead of her then-usual scribbles.

Growing collection inside the box.
You can tell she wasn't big on handwriting then, but she brought the box to school and handed valentines out to her classmates

This year, to encourage her to actually write words on the cards, our card-making station looks like this:
We had all these materials in her art shelf, just now repurposed for Valentines

The top reason I've stuck with card-making year after year?  I see how she's grown better at it.
First her handwriting:


But best of all, her thoughtfulness.
This year I'm amazed how she had personal insight into each person she chose.

Raj gets the minecraft card; Allie gets her favourite cookies all over hers; and so on.

Sometimes the simplest traditions are the best, don't you think?


post signature

Saturday, 23 August 2014

Child-Made Scrapbook: 2 Ways

Kids today are so lucky that travel is much cheaper for their parents.  I didn't travel to another country until I was in high school, nor did I visit Boracay until I was a yuppie!  Nowadays Boracay is a teenage rite of passage, and Cebu Pacific has actually told my husband we are one of their frequent flyers.  

I do worry that children won't even remember the places they go to.  Worse, I'm not much of a photographer when we're on vacation.  Here's a fun way to get preschoolers more appreciative of their travels and a great introduction to journaling:


There's a little spot in her room which I reserve as a memory board of sorts:

Later on I'd like to use this as a geography corner as well - just haven't gotten around to it!

Before you think I'm great at crafts, let me tell you that this is just washi tape:

cover a cork board in wash tape frame: completely doable in fifteen minutes

I let her cut up the brochures I saved on the trip.  It's tempting to take over the choice of memories, but I let her have complete freedom in choosing which ones were dear to her:


We used our stash of hole fasteners here to pin them to the cork.  
She's not too sturdy with her fine motor yet, otherwise pushpins are still the easiest.   

Bring a single-hole puncher in case the fasteners won't pop through thicker paper, like tickets.

Her memories of Thailand: 

clockwise: Siam Ocean World, Kidzania, Siam Niramit show, the Snake Farm

Keep it free-flowing and follow your child's lead completely.  

Afterwards she wanted to do more with the brochures so she decorated the kiddie hat from Siam Ocean World with a glue stick.  She wore this and pretended to be a tour guide of the Snake Farm:


After doing one together as our weekend play bonding, I tried to adapt it as a (what else) leave-behind play activity!  

I have a whole gallery, a talk, and social media accounts dedicated for easy leave-behind play ideas for working moms to keep play going even while we're at the office.  These are basically just invitations to play that are very easy for your little one to understand.

Since we've done one together, this needed no further prompts more than this simple setup:

Find contact paper at the wallpaper and blinds section of Ace, True Value or Handyman


I usually set out the play invitations at night for her to discover and do at her own pace.  But when she saw this one, she couldn't wait to do it.  That's why I have these pictures:

She finished cutting the brochures by herself, stuck the tickets, and started decorating the empty spaces with sequins.  

If you don't have contact paper around, you can use stickers to use as "tape" instead - just make sure your child gets what to do.
But contact paper makes it really easy for even 2-3 year olds to make collages though!


Her memories of her Singapore birthday trip:
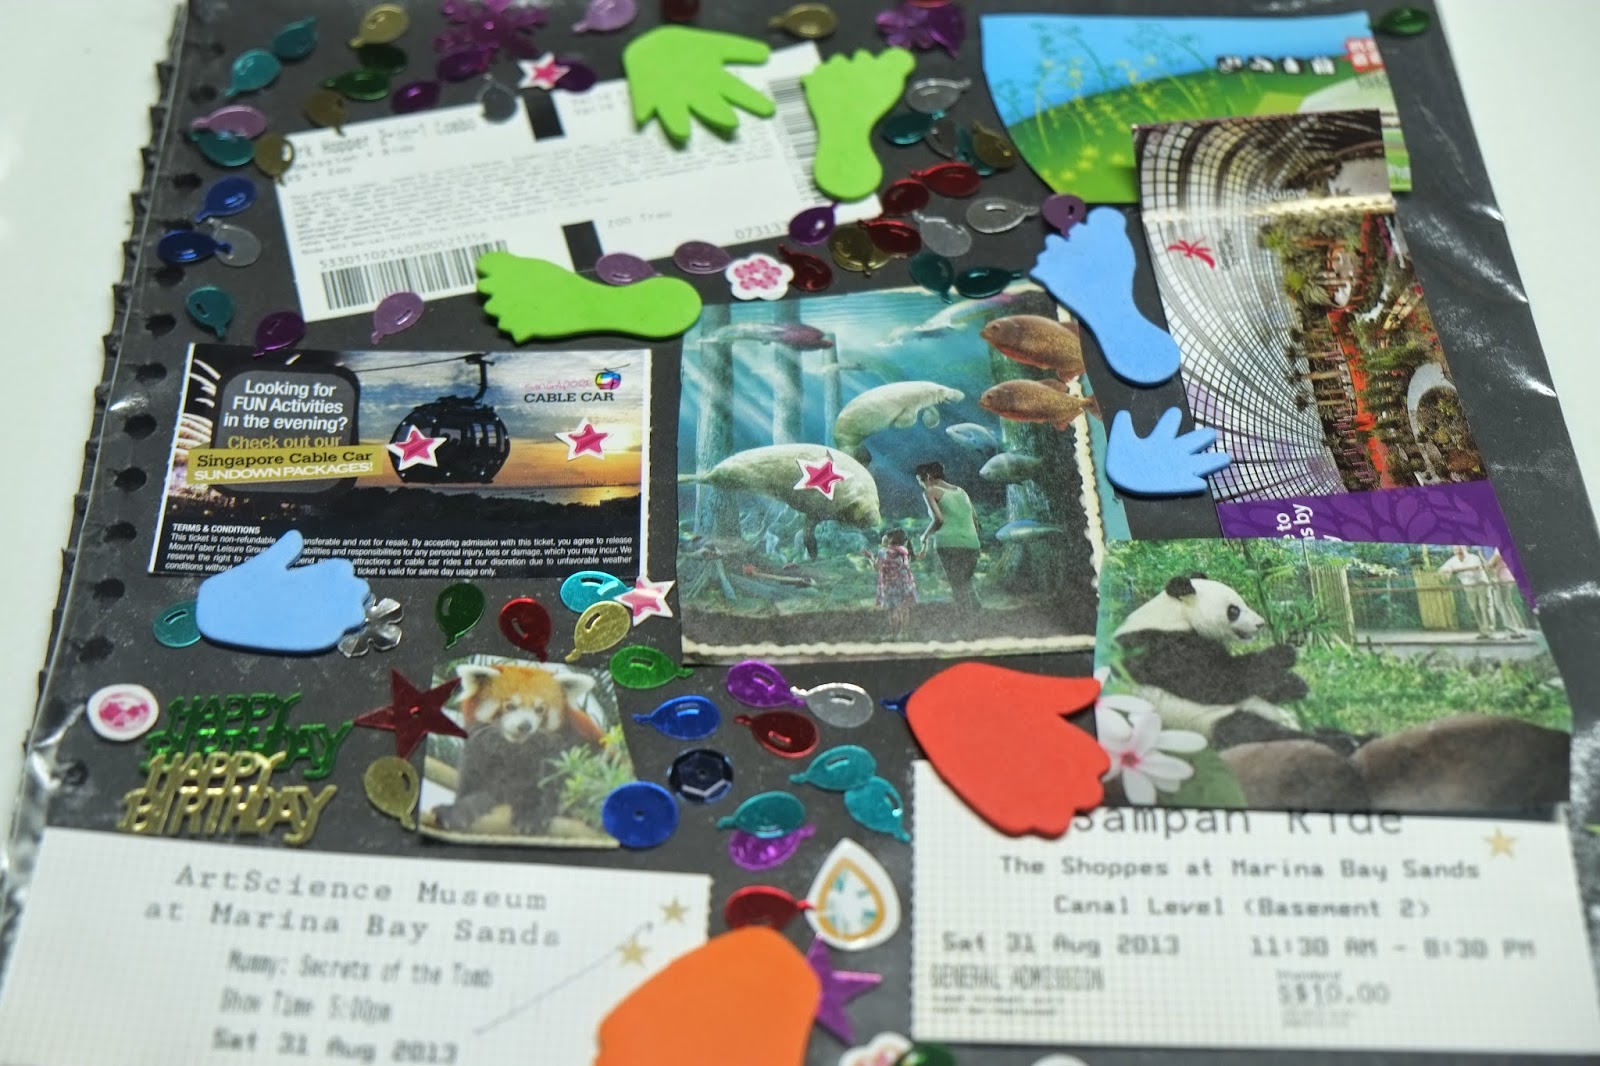
Clockwise: Flower Dome, River Safari, Sampan Ride, The Mummy Secrets of the Tomb Exhibit, Cable Car Ride

After I let this work stay up for a few weeks, I snap a picture and throw them away so I don't keep paper clutter.  They'll find their way to the travel photo book soon.  Which really means 'eventually'.

As is most play at the toddler and preschool age, it's about the process rather than the finished result.  Doing this together, or talking about what she chose at the end of the day sparked a nice little conversation, gave me more insights into her, and relived memories of being happy.

Notice it's "memories of being happy" not "happy memories"?  After all, memories fade but the feelings of a happy childhood you always remember.  


post signature

Tuesday, 17 June 2014

DIY Montessori Movable Alphabet

Our version of Montessori's movable alphabet is still going strong in our playroom shelf!   It's one of my favourite leave-behind activities for Ladybug Girl to play with while I'm at the office.  

Want to see how we're continuing to use it?

When she was three, I discovered by trial-and-error that a home version of the Montessori movable alphabet worked best for learning letter sounds in starting to make words.  If you're new to this blog (*hello*) please see this post last year on super simple ways to get started at early preschool stage.  
We're using the same DIY set I made more than a year ago: alphabet magnets in drawer organizers.  And a cooking tray from the kitchen.
In hindsight I would have used the cheaper plastic alphabet magnets available everywhere.
These Melissa and Doug magnets went from 550 pesos to 795 pesos in a single year - crazy profit!
We still use them as Montessori intended - to enable kids to practice the sounds of the letters to make words without three hang-ups: correct spelling, legible writing and the pressure of reading aloud.  Those three things are a different set of skills that come later - otherwise they can easily discourage kids from starting to read and communicate.  I've seen all these happen with Ladybug Girl!  
Can you tell I've been reading up on this?  (*nerd cough*)   Well, we're still doing basic word-making:
I put out a simple flashcard prompt at night and sometime during the next days she chooses the letters to make the word.
Remember: don't correct the spelling unless asked!  In Montessori they start correcting spelling at Grade 2.
This one was for Halloween last October
A quick learning opportunity on the "SH" sound
Here's another way to make word-making more sensorial while working on fine motor hand strength at the same time: use moon dough as a stamping pad.  Moon dough doesn't dry up unlike play dough.
I used PlayDoh letters and numbers set and set out a stamping 'pad' made out of moon dough over a small lid.
Extra mommy credit for painstaking letter labels for my left-handed daughter, yes?  Haha
Now that Ladybug Girl is a little older at five, I can see the genius of the movable alphabet in encouraging her to write (the creative kind) even without mastering how to write (the handwriting kind).  Ladybug Girl and fine motor skills were not early friends, you see.  Massive understatement.  
I came across the idea of preschool journaling here and here, but I still need to test how it can be working-mom friendly on top of Ladybug Girl's reluctance to do handwriting.  Using our DIY movable alphabet is a start!
I leave out prompts like this:
"My favourite toys are:" invitation to make a list.
Adapt your words and handwriting to your child's skill level - example "I (heart) my toys:"

Notice the use of a big D instead of the small letter d?  She keeps doing this because that's how she learned to write the D in her name and it's gone uncorrected.  This made me realise that it's time to correct that one in her name, at least.

To make marks on the cooking tray, I used these dry-erase crayons:

Now in Toys R Us in Manila!  No more hoarding these things in Singapore!

Our last one before school started.  I'm looking forward to coming home to more stories and conversations through our movable alphabet play:

"My summer vacation story"

"Boracay, Tagaytay, Play, Write, Buy Toys" made for an interesting conversation after I got home from work.
She says "write" as "writ-uh!" with a very strong T sound in the end : hence the spelling.

For more DIY movable alphabet versions see Montessori Printshop's paper version here and Living Montessori Now's round-up of ideas here.

We have a little gallery of posts on the moveable alphabet here (find it on the sidebar too):

One hundred years old - and a year into using this at home - it's still shiny and new.  
And now it's working-mom friendly too!


post signature
diycorporatemom.ph@gmail.com


Sunday, 15 June 2014

Play to Teach Our Culture

With Ladybug Girl going into grade one this school year, I've become very conscious about modelling a love of the Philippines for her.  I find it hard because public resources for children her age are few and well, boring.
Much as I love her Montessori preschool, it is painfully Western.  

Sunday, 8 June 2014

Lazy Mom Tricks for Leave-Behind Play


Sometimes making leave-behind play trays for my daughter gets too high-maintenance.  I'm an ideas person, so if I'm not excited about a leave-behind play tray idea then I get too lazy to make anything.  Sometimes laziness takes over and her trays remain finished for days before I replace them.

I've discovered these four tricks when ideas don't come.  Or when things get too crazy for more thoughtful play.

***

1. Jigsaw Puzzles.  They seem like a good idea to buy at first, but the reality is they're never something Ladybug Girl reaches for voluntarily.  Turn these one-hit wonders into daily play with super simple invitations like these.

Match mommy to animal baby name

Test the learning by sorting into two piles

Leave out the pieces dumped in a tray with a picture guide to follow

2.  Puzzle Game Sets.  You know those toys where you can get a succession of play levels to pull out and play over and over?  Never happens.  So these play trays are mainstays on our shelves.  The idea is you keep advancing the progress one day at a time.

My sister gave this castle puzzle for Ladybug Girl's first birthday.  I brought it out when she turned three - and it's been out on our shelves for two years and counting!  She's now at "Expert" levels.
Magnetic tangram puzzles from Hobbes and Landes.  Ladybug Girl drew all over the original prints when she was two, so I spray painted the pieces yellow to reuse them.  It's also more challenging to match shapes that way.

A Mighty Mind puzzle a day is the easiest tray I've put out.

3. Art Sets.  I'm a sucker for these because they make things so easy... to throw away after.  That's my way of dealing with clutter.  Snap a photo and throw out!  I don't feel guilty because these art sets are meant to be consumed, not kept.  

I couldn't tell you where I bought these anymore, these were so random.
They're not that cheap (200 pesos and up) but are great at fine motor practice.

I flipped these wooden animals so that she could paint the back the next day -- extended play for the sets!

4.  Activity Books.  Rip 'em up page by page.  Do it!  It's liberating.  And it'll actually get used instead of rotting unfinished.

The ever-popular sticker activity book gets ripped and prepared this way

My favourite toddler workbooks are still super useful as regular play for my little lefty

Taro Gomi doodle book placemats are a daily art invitation.  Just leave out different art materials to keep things fresh


Creative play can be pretty low maintenance, see.  Lazy-mom tested!


post signature
I love discovering ways that makes creating play easy during the workday for working mommas like me, so I share them on this blog as a "leave-behind-play" series.  The gallery on the upper right side of the blog has all the links all organised and visual for you to choose.