Saturday 29 June 2013

New Patterns at Work and Play


Ever since I wrote a post about turning a milestone with Ladybug Girl's separation anxiety, I've been noticing new patterns in our household.


The bad : at work.  Twelve hour workdays have become the norm.  Sure I love my job but not that much.  Because I leave for work early now, there's no more playtime with Ladybug Girl in the mornings, and barely an hour of bonding before we sleep.  Adjustments needed.

The good: at play.  Our new pattern for after-work play is a lot less "restricted" if you will.  It used to be part of our rules not to wind her up at night after she's had her half-bath.  But nowadays of course, we get too excited when see each other and she brings me around her shelves to show me the leave-behind activities she finished.   Then inevitably she wants to do something, anything with me.  

How can anyone resist a duet performance?

Or making a "book" out of cardboard and duct tape?

Now her body clock has been wired to sleep at 10 pm to adjust to her late mommy, and then thanks to the brighter sunlight streaming into her new room, she gets up at 7 am for school (and naps in the afternoon).  Sticking to a bedtime routine since she was a baby has really helped, and I'm so thankful we can now relax the rules a little and count on her body clock over our parent clock.

We strung up ribbon all over her room before our "poop party".
We just make these things up as we go along!

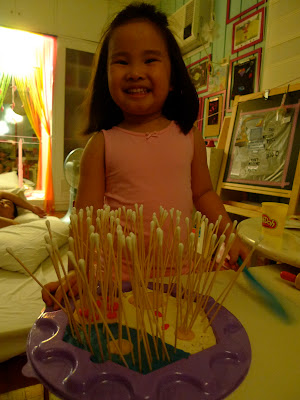
Her open shelves of supplies are now a lifesaver instead of a bedtime distraction.  They keep things accessible for instant made-up play.  On one late night coming home, I brought in some pizza to eat late dinner in her room.  Inspired, she wanted to make one of her own.  It was easy to grab some play doh and a puzzle tray from her shelf.

She ran to kitchen and found these long wooden cotton buds I had forgotten I placed there for baking play.
We got in some practice counting the "candles" as she put each one in.   
She's still learning to count past twenty, so in the middle of it all she slumped her shoulders and hung her head down reeeeally low and said "I need to go to number school".  Oh but she is the perfect stress reliever!
I laughed and assured her she was getting better.  

Speaking of stress relief, you may be wondering where Awesome Guy is during these nights.
See if you can spot him here.

Yes, fast asleep usually.  Good thing we also have a new pattern nowadays - riding to work together in the mornings!  It's been nice to carve out that extra time everyday, just the two of us.

This is just a reenactment of the "fun" we have.  Haha.  Poor neglected guy, he's been so patient.   

Now if I can just change that work pattern, everything would be perfect.  I know it's unrealistic to expect work to get done by 5, so how do other moms manage to leave at a reasonable time?  I wonder, maybe I should have a winding down routine too.  

Or I might just try Awesome Guy's suggestion after he spotted a pattern of last-minute meetings we like to have at my office.  He says I should just keep my head down and not look anyone in the eye as I pack up and go.  Sometimes in those late meetings, I just want to yell: Uwing-uwi na ako!  

Okay, sometimes I do.


Click here to see the posts on how I try to make after-work life work.  'Try' being the operative word.

Thursday 13 June 2013

Holiday Play: Bubble Wrap Flag

Happy Independence Day, Philippines!  In your honor, Ladybug Girl and I made your flag to celebrate.


We had already planned for the day to include making the flag but I hadn't thought beyond that.  But as  I picked up some bubble wrap from Awesome Guy's toy organizing session in the dining room floor, this use came to mind:

Freehand painting on bubble wrap during one playdate activity with her cousin, at three years old.

  And so in five minutes flat this was set up:


First I taped down the bubble wrap over the bench so it wouldn't move.  It was already making a very nice rectangle shape for the flag, but any table would do if you pre-cut the bubble wrap.  Then I drew a flag with a black permanent marker.


Now mix up each paint color with with equal parts glue.  This makes the paint stick to the bubble wrap.
Ladybug Girl mixed in some glitter with paint, too.

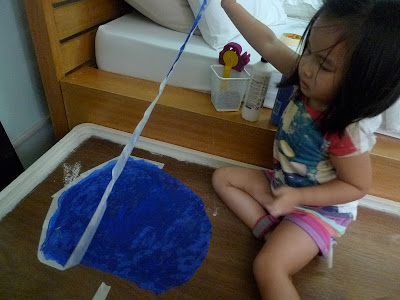
Now paint!
Before painting, we looked at the flag and talked about which colors go where.  

I filled in the tricker parts of the flag while Ladybug Girl did the blue section.
But I was really just itching to try it out myself.  (So fun)

Now the yellow, my favorite part of our flag.


But here was Ladybug Girl's favorite part: sprinkling more glitter on.
Skip this if you don't want more mess.  Not only did glitter end up on the floor, there's no guarantee that every granule will stick to the paint mixture when dry.  The little girl absolutely loved it though.

We forgot the white, so I hurriedly painted it on while Ladybug Girl followed my brush with some silver glitter.  We laughed together as she teased me to hurry up.
So few materials and such a lot of fun!
I just cut away the extra bubble wrap on the sides, and had ourselves a flag.

Here is our flag, all dry and proudly hanging up in her room.
It really sparkles in person!


We even did a 'print' of the whole thing: I cut some white craft paper from her easel, and she did the print all by herself.


And then the celebration went on with her "preparing for a party".
She ran to get her window crayons to decorate the mirror and made Ube ice cream from her sweet shop.
Flag stickers are from Kultura.

"Party preps"

And now I need advice.  How do you explain to a four-year old about Independence Day?  And to my little Dove who tears up whenever there's a story with conflict -- let alone a war?

A page from Filipino Celebrations.


This was my spur-of-the-moment attempt during bedtime:
Can you guess who the bad piggies and angry birds were?  
Ladybug Girl laughed and said "but Mommy, Spain is not bad!"  "Well they were back then, sweetheart!"

This was probably not very politically correct, but you must admit it is very preschool-friendly.


See more play ideas on the GALLERIES tab on the upper right side of the blog.  
All super easy and working-mom tested.

Tuesday 11 June 2013

Turn a Bed into a Playscape

This is the biggest project Ladybug Girl and I have undertaken together.  A week of forced bed rest can make one think of crazy ideas that actually work!  


Back in January, I was down for a week of bronchitis and then another week of pneumonia.  Ladybug Girl and her daddy moved to her room to sleep - which left this big blank space beside me to stare at day after day:

This extended sleeping arrangement jumpstarted the big move to an independent bedroom for Ladybug Girl.

I began to get this idea to make use of all that "unused" space hidden under the bed cushion for a play table.  It's the kid in me : I love diorama displays in museums and toy shops.

... like this Lego diorama of Bolinao town in the Philippines (at Legoland)

... or this farm table in Ark Avilon Zoo.

I figured the best way to maximize the play would be to make different kinds of 'landscapes'.  I used masking tape to mark each area, and we did one new habitat per day.

We spent 20 minutes a day doing our project.  I was highly contagious but she still had separation anxiety then (and I missed her too), so I wore a mask and was very careful not to cough near her.   Twenty minutes was all I could do before getting tired.

Set the timer... Mix some plain old poster paint ... And sponge it on.

Can you tell what landscape we made?

The next day:
We mixed some sandy brown for the beach.


The day after, we did the snow landscape:
I handed her a circle-shaped sponge that I had saved from some packaging before and left her to do some snow art.  I called it a ...er... snow fort?


I asked her what other landscape areas we needed, and she said "rock".  
So that's what this black blob beside the beach is.


On our last day we did a lake:
We talked about what kind of animals live in each habitat we were painting.


And finally a grassy plain:
"a plain is a large grass space with no trees!", declared Ladybug Girl.
Credit goes to Super Why videos on the iPad.  


By this time she was getting bored and left me to turn her bathroom into a play space.  I finished up while she was away and we celebrated with our "dance of joy".

Basically we just jump up and down and scream "yay".  She did the jumping for me this time.


This stayed for a few days until I got well and was able to coat the whole thing with some polyurethane sealant, which you can get at the hardware store.
The sealant keeps the colors from staining the underside of the cushion.
A safety tip: if you see some wood splintering (like I did), go over it lightly with some sandpaper before painting.


Once it was dry and cured for two days, we moved it to her playroom and set it up to celebrate Ladybug Girl's new big girl room.


And I had just as much fun setting up the playscape!
We brought out all of the Strawberry Shortcake toys we had collected...
... and we made Berry Bitty City!

Worth mentioning: we had collected the toys when Ladybug Girl was two and half years old, when nearly all the Strawberry Shortcake toys went on 50% off sale to be discontinued.  But frankly, I went too toy-crazy when she turned old enough to play.  The playroom used to have a permanent playscape spot like this:

Which was too much clutter for the amount of play it got anyway.

After a mini-epiphany from reading an article about how physical clutter becomes mental clutter in kids, I swept everything into two bins that we only take out during special occasions like when visitors come over.

I still can't bring myself to part with the whole thing though.  I'm hanging on until I get more return on investment.  LOL.


So we spent a Saturday morning getting lost in pretend stories.


Or using the landscape as a racing space.  Racing is her new thing.


And now we have an extra play space in her room!  There are so many possibilities for other themes: like a racetrack for boys... or hey, planets in space for an Angry Birds Space theme?  Ok, Ladybug Girl would love that too.  How about painting it with chalkboard for the most versatility?


This was probably my most productive bed rest ever.  I think I enjoyed being sick just a little too much.


Friday 7 June 2013

Hammering Hearts


I am not particularly girly, but I couldn't resist some heart paper fasteners at a paper craft store.


So Ladybug Girl got to use them on another leave-behind activity to do while I was at work:

A hammering tray!


Here's how I made it from an old cork board piece you can get at National Bookstore:

I used two boards so the pins don't poke through the other side and secured the edges with tape (I used washi tape).  Finally tape down a thin piece of kitchen tissue roll.


Draw a design on the tissue using dots as a guide.  You can always leave it up to them to freehand too.

I did this in a few minutes while this strange event was going on:
It's a long story.

Here it is when she finished hammering all the hearts in:


And a few days later, I left some nail polish bottles in fun colors for her to paint the hearts (this was without a photo due to the early morning rush to work):
We ripped out the kitchen tissue together that night.

And here is what it looks like temporarily hanging on her art gallery wall:


If I had discovered these fasteners when Ladybug Girl was younger, I would have used a squishier base like styrofoam.

We tried it together one weekend anyway.

You didn't even need a hammer to push it in, but it was fun!


We only had a styrofoam ball handy, which I split into two and we painted each half with our favorite colors.

Any ideas what else I can do with them?  Valentines is a long way off!